Alternative Starting Techniques
Tatreez Starting Techniques Without Knots
As you advance your skills, it is time to let go of the knot start and explore alternative starting techniques. Starting your stitches with a bulky knot to anchor your thread can result in a messy back. A knot that protrudes from the backside will disrupt the smoothness of your stitches, leading to a tangled appearance. As you continue stitching, these protruding knots can catch on your needle, creating accidental knots and further cluttering the back of your work.
This post will explore starting techniques including Tuck Start, Loop Start, and Pin Start.
1. Tuck Start
The tuck start technique is compatible with any embroidery thread (Pearl Cotton & Embroidery Floss). As the name suggests, the beginning of your thread will be tucked in the initial stitches you create. Recall the cross-stitch instructions from our previous post and follow these steps to create a knotless start using a few half stitches.
Video Demonstration


How to Create a Tuck Start (Knotless Start)
Thread your needle and insert it into your aida cloth or waste canvas from the back. As you insert the needle, ensure that you pull it through the canvas but leave approximately 1-2 cm of thread at the back. Maintain a firm grip on this excess thread at the back, preventing it from pulling through entirely.
Continue holding the thread, and start to make half-stitches. Ensure that the excess thread is overlapped with your next move. This overlapping action ensures that the thread is secured by the cross stitch itself, allowing you to let go.
Once you have reached your desired half stitches, complete them by stitching backward. Ensure that you overlap the excess thread once again.
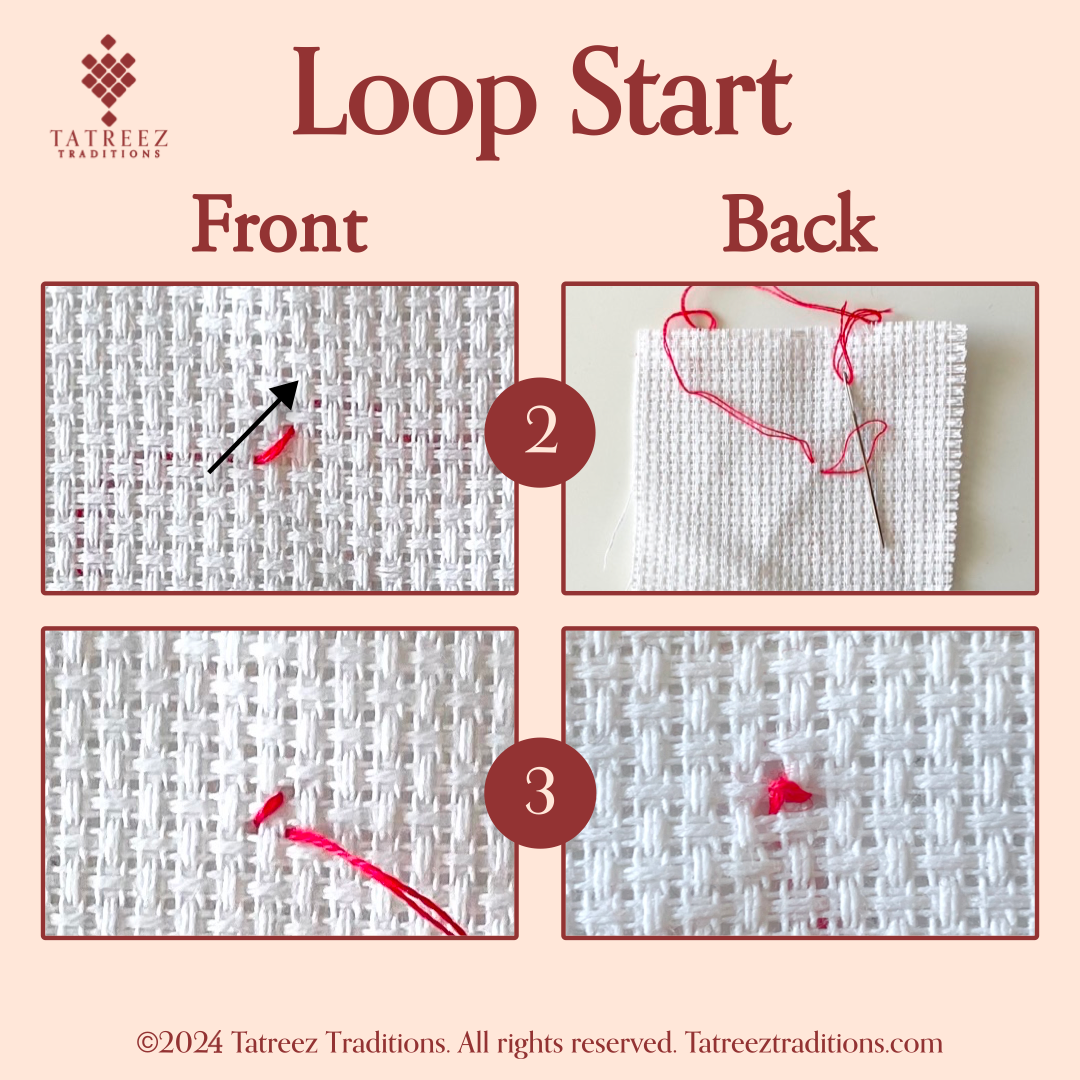
2. Loop Start
This loop start technique is a fast way to start your stitches and creates a mini knot that fits seamlessly with the rest of your stitches. This technique works best with double-layered embroidery floss. This means a single strand of the embroidery floss is folded on itself and then threaded through the needle ends first, leaving the loop end as the longer end. To create a thicker appearance, more strands can be used.
The following is a visual demonstration of how to create a loop start.
Video Demonstration


How to Create a Loop Start (1 folded strand of embroidery floss)
Thread both ends of a single strand of embroidery floss to form a loop at one end.
Insert your needle through your starting point, leaving the looped end of the thread at the back. Be careful not to pull the thread entirely through.
Insert your needle diagonally to your next point, again ensuring not to pull the thread entirely through.
Once the needle is at the back, insert it through the loop and pull it all the way through to tighten the loop knot.
Proceed by inserting your needle into your next point and continue stitching.
3. Pin Start
A pin start is compatible with any embroidery thread (Pearl Cotton or Embroidery Floss). It works best with aida cloth, evenweave, or linen cross stitch fabric. In this technique, an additional fifth point, located at the center, is introduced to ensure a secure stitch.

Video Demonstration


How to Create a Pin Start
Begin by inserting your needle from the front into the center of your initial cross stitch. Leave approximately 1-2 cm of thread in the front. Maintain a firm grip on this excess thread at the back, preventing it from pulling through entirely.
Next, insert your needle from the back through any corner point.
Then, insert the needle from the front into the center once more.
Then, insert your needle from the back through the next point diagonally opposite the first.
Insert the needle again from the front through the center. This completes a half stitch using the center point.
Trim the excess thread left at the front from Step 1 as close to the center as possible.
Finally, continue half-stitching or complete your first stitch according to your pattern.
Start Applying Your New Skills!
Take your new skills and explore alternatives to the knot start method. Using a bulky knot to anchor your thread may initially seem convenient. Still, it often leads to a messy back, disrupting the smoothness of your stitches and potentially causing accidental knots. By exploring methods such as the Tuck Start, Loop Start, and Pin Start, embroiderers can achieve cleaner, more professional results while avoiding the pitfalls associated with bulky knots. Through experimentation and practice with these alternative techniques, you can elevate the quality of your embroidery work and achieve a polished finish.